Whether you are a DIYer, an electronics hobbyist, or someone who does small-time repairs, you can get away with a regular soldering iron for most soldering and desoldering jobs. However, there are some situations where a better tool can make the task much easier. I recently produced some homemade PCBs and wanted to hand solder all the components. After soldering a couple of TQFP Microcontrollers, I thought there must be a simple, low-cost alternative to hand soldering. In the process, I stumbled upon the G3061 Mini Hot Plate PD65W .
As the name suggests, it is a heating plate for soldering (or desoldering) SMD components. I immediately ordered one and have been using it for about a month now. The G3061 caught my attention not only because of its size but also due to USB-C power input and a simple interface (which I did not like after using it).
In this review, I would like to express my experiences of using the G3061 Mini Hot Plate. I will walk through the unit’s design, heating performance, safety features, price-to-functionality ratio, and hands-on testing.
Unboxing
Inside the box, we’ll get the main hot plate unit and a basic user manual. While the hot plate works with an external USB-PD Power Supply, the box doesn’t come with one (not even a USB Type-C Cable). So, make sure you have a good quality USB-PD Adapter that is capable of delivering 65W or higher and a USB C-to-C cable rated similarly.
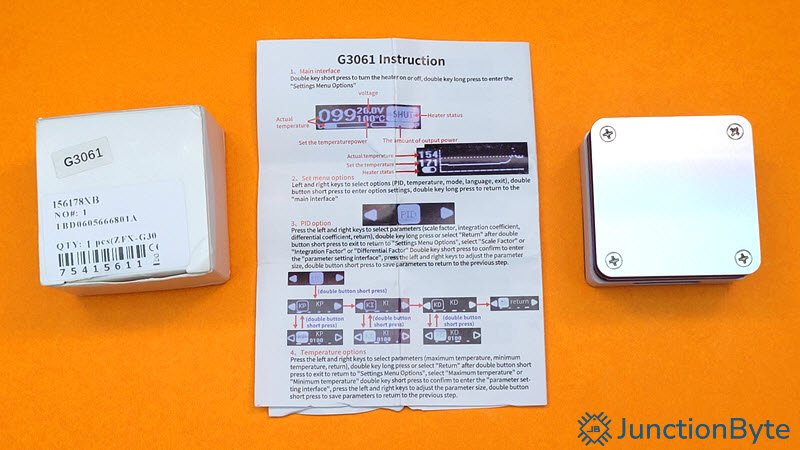
The user manual tries to explain all the different functions and settings of the UI. However, it is very difficult to understand them. I will try to explain some of the basic operations in this review.
Design and Build Quality
The G3061 Mini Hot Plate is a compact little unit measuring just 56mm x 56mm x 36mm. It is one of the smallest in its category. The top heating surface is made of anodized aluminum.
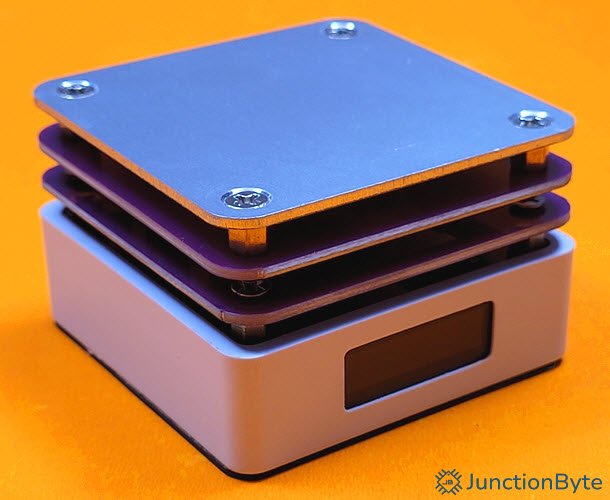
If you notice, the hot plate and the main body are separated using two dummy PCBs through a bunch of spacers and screws. Even though the rest of the body is made from plastic, this spacing ensures that the hot plate doesn’t come in contact with the plastic.
On the front, there is a tiny OLED display. I will talk more about the display elements and UI in a later section. The USB-C Port is on the back of the unit along with the two buttons. We have to perform all the operations using these two buttons.
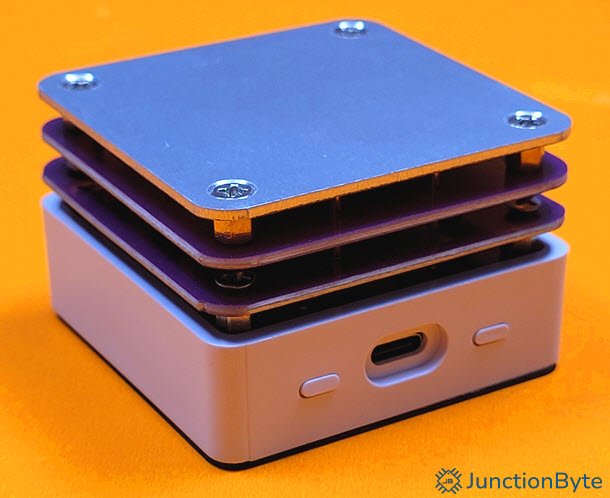
The entire bottom section of the unit is covered in a non-slip rubber mat. This will keep the unit steady during use, even on uneven surfaces.
User Interface
As I said before, the G3061 Hot Plate has a USB-C Port for power. It can negotiate USB-PD up to 20V and 3.3A. So, to get the best out of this unit, we have to power it with a USB-PD Adapter that can deliver at least 65W.
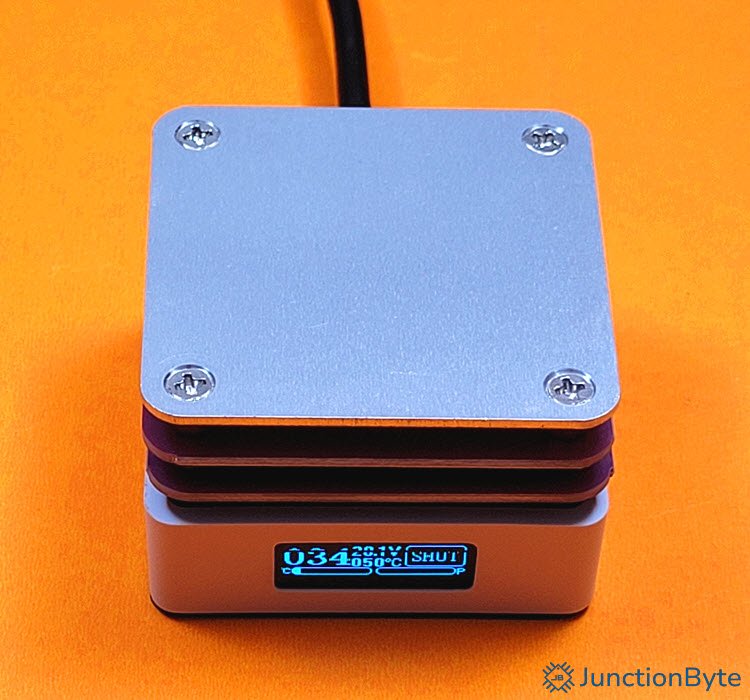
To be on the safe side, I used my trusty 100W USB-PD Adapter to power the G3061. Upon powering on, the message “GDCHP” briefly appeared on the OLED display. We then get to the main interface on the display.
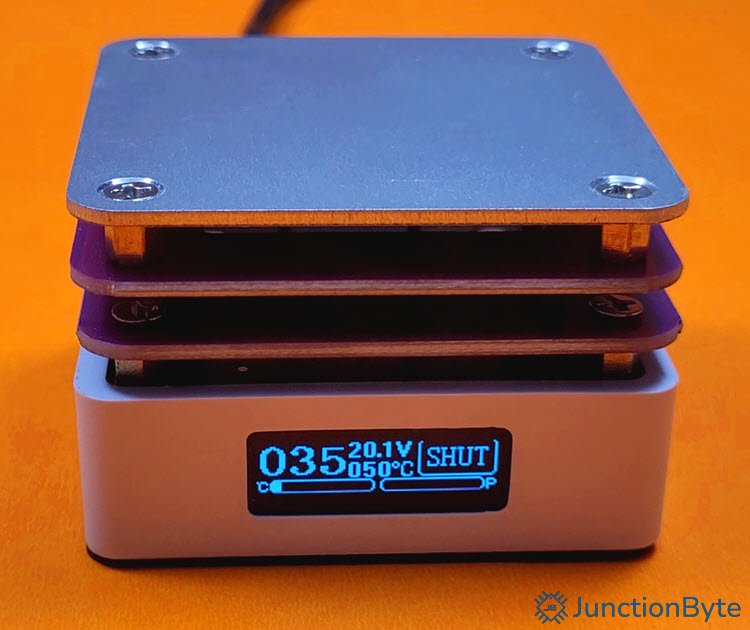
Here are the things that you can see on this screen:
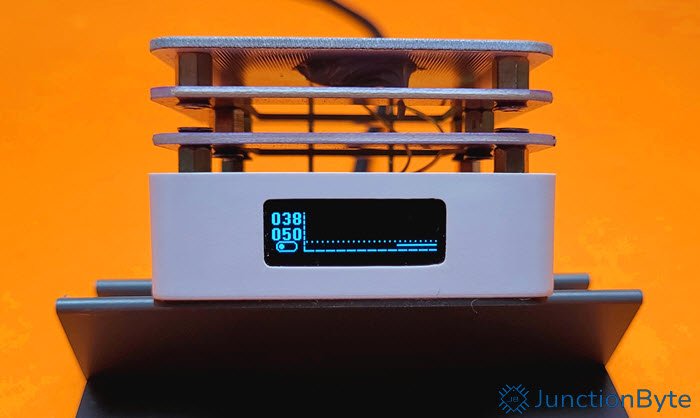
- Current Plate Temperature (large 3-digit number, 035 in the image)
- Input Voltage (20.1V)
- Set Temperature (Desired Temperature, 50°C)
- Heating Status (SHUT)
- Temperature Bar (shows the Current/Actual Plate Temperature)
- Input Power Bar
Basic Controls
In this menu, we can adjust the temperature using the two buttons. With the display facing us, the button on the right will increase the temperature while the button on the left will decrease it. You can press and hold the buttons to rapidly increase/decrease the values.
Note that this action will only set the desired temperature but the heater is still inactive (as indicated by the ‘SHUT’ icon).
Once the temperature is set, you need to press both the buttons simultaneously to start the heater. The status will change to ‘HEAT’ and the hot plate gradually becomes hot.
After the hot plate reaches the set temperature, the status changes to ‘CT,’ which I assume stands for constant temperature.
To stop the heating process, you have to press both the buttons simultaneously once again (which is easier said than done).
This is the basic operation of the hot plate. Next, I will explain how to access the advanced settings menu.
Advanced Settings
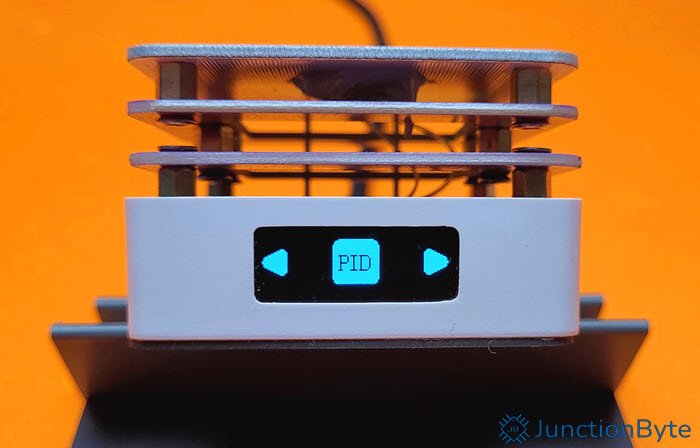
Press and hold both the buttons simultaneously to enter the settings menu. The main options are:
- PID
- TEMP
- MODE
- LANG
- BACK
To enter a specific menu, press both the buttons at once. Use each button to navigate left or right respectively. Press and hold the buttons to exit (or go back).
The first option is PID. In this, we can adjust the Proportional (KP), Integral (KI), and Derivative (KD) components of the temperature controller. However, without proper instructions and calibration equipment, I don’t understand how an average user would mess with these numbers. Nonetheless, the device gives you the option to refine the feedback loop parameters.
In the ‘TEMP’ menu, you can adjust the limits of maximum and minimum temperatures. When we are trying to set the desired temperature in the main menu, these limits come into play.
The maximum temperature supported by the G3061 Hot Plate is between 200°C and 350°C while it is between 0°C and 200°C for the minimum temperature.
For example, if you set the minimum temperature as 30°C and maximum as 250°C, then you cannot go beyond these limits while adjusting the temperature of the heater.
The ‘MODE’ menu allows you to change the type of display of the home screen. By default, it is in ‘INFO’ (where you will get all the 7 parameters that I showed previously). Alternatively, you can change it to ‘CURVE’ mode to see some graphs.
Last but not least, in the ‘LANG’ menu you can choose between Chinese and English languages.
Every sub-menu has a dedicated ‘RETURN’ option to go back to the previous menu. You can press and hold both the buttons at once to go back to the previous screen at any time.
Performance of G3061 Mini Hot Plate
How did this tiny hot plate perform? First of all, setting the temperature and starting the ‘Heat’ is the easy part. The hot plate heats up pretty quickly. Here are some timings that I recorded with idle temperature of the plate at 31°C:
| 31°C To 50°C | 25s |
| 50°C To 100°C | 25s |
| 100°C To 150°C | 24s |
| 150°C To 200°C | 46s |
| From 200°C to ambient (around 31°C) | >9min |
Using my FNIRSI FNAC-28 USB Tester, I monitored the power it draws and with 20V supply the current peaked at 3.2A (for heater temperature of 230°C). It is drawing close to the maximum rated power. This is why I suggested a higher wattage USB-PD Power Adapter.
Surprisingly, the heat distribution is very uniform i.e., all parts of the plate (corners, center) have even temperatures. In the following image, you can see the temperature at two different points on the surface.
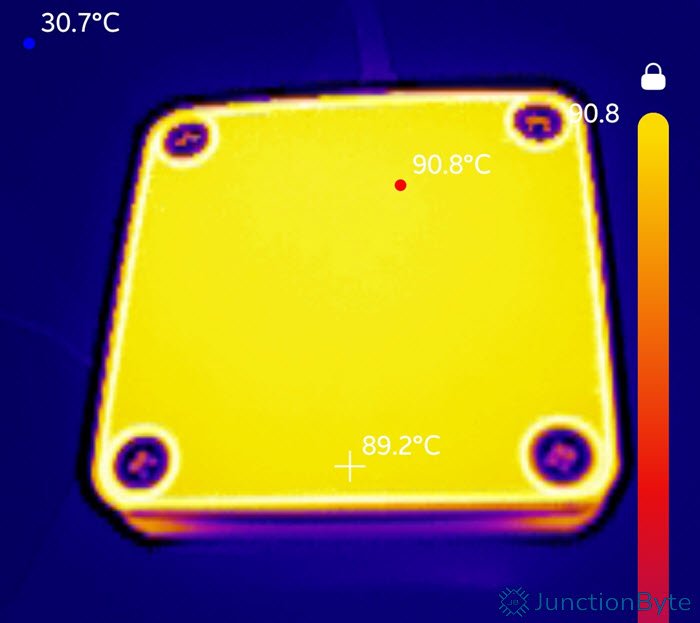
If you notice the four cool spots, they are screws that hold the plate with the rest of the unit. You will lose heat in the corners due to these screws. But on a positive note, the screws are recessed and won’t come in the way.
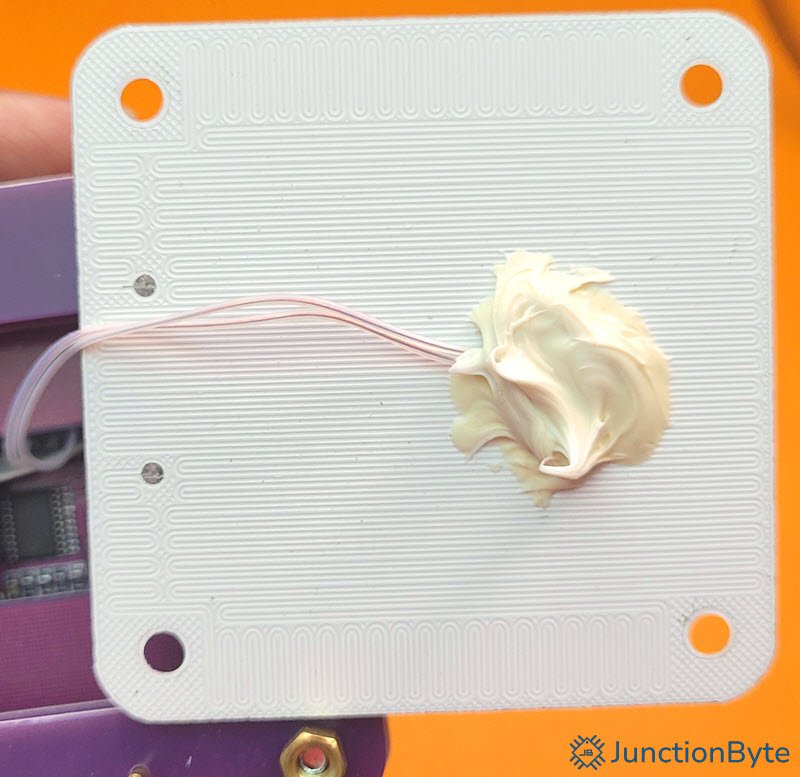
Out of curiosity, I dismantled the unit completely and here you can see the pattern of the heating element on the bottom side of the plate. The two silver dots on the left are the main contact points, where a couple of long pogo pins attach. These pins carry the power from the main control board to the heating element.
Accuracy however is an issue. I set the temperature to 150°C but the thermal camera says something different (about 133°C).

Keep this in mind and set the temperature accordingly.
Soldering Test
Coming to the actual soldering, I tested on a demo board that has several components of varying package styles. For solder, I used the popular Mechanic XG-50 Solder Paste. I am satisfied with the soldering results, especially ICs. For smaller components, it properly soldered more than 90% of the parts. I had to manually solder the one or two components that it missed (though it could have been how I applied the solder paste as I did not have a stencil).
The downside is when you try to turn off the heater (where you have to press both the buttons), all the surfaces are extremely hot and it is very difficult to hold the unit and wrap your fingers around it. I felt it is easier to switch off the power supply rather than try to press the buttons and burn your fingers.
Price
I bought the G3061 Hot Plate from SUNSKy ONLINE for about ₹1,300 (or approx. $15). For the price, I believe it is a very good addition to your workbench. The temperature calibration could have been better and I hope the hot plate (or rather the heating element) lasts a while without damage.
The working area is small and it is okay for repair work where we have to desolder an IC (or occasionally solder one). Not suitable for regular use or slightly larger jobs.
Conclusion
Overall, the G3061 PD65W Mini Hot Plate is a very capable little device. It replaces bulky equipment for small PCB repairs, but don’t expect desktop-level performance. If you need a no nonsense unit for quick fixes, this hot plate delivers.
It runs off of a 65W USB-PD Power supply and doesn’t come with one. So, you have to source one yourself.
The temperature calibration is slightly off but you can get away by adjusting the desired temperature slightly above the necessary value.
If you are looking for a low-cost, easy-to-use soldering and desoldering hot plate for small repair jobs (quick soldering and desoldering), then the G3061 PD65W Mini Hot Plate is definitely worth checking out. It is much more affordable than some of the alternatives in the market.