I recently “borrowed” a 100W USB-PD Power Adapter from my office for testing some products. To monitor the voltage and current from the USB Port, I used one of those basic USB Meter things, which I had lying around. It could only display the readings (primarily voltage, current, and wattage) on its tiny LCD and there is no way to maintain a record of the data. After some research, I found out that there are much more complex USB Meters that could not only record the data but even act as triggers for different types of Fast Charging protocols. One such interesting product is the FNIRSI FNB58 USB Tester and Fast Charge Trigger.
After looking at the specs, I was really impressed with its capabilities and purchased one immediately. I have been using this device regularly with all my USB devices and even as a USB-PD Trigger.
I would like to share my experiences of using the FNIRSI FNB58 USB Power Meter. I’m probably late to the party of “FNB58 Review” but if this guide could help you get an interesting and useful product, it is worth the effort. If you remember, I used the FNB58 in my review of the 4-Channel 18650 Battery Capacity Tester to check the power draw of the unit.
This post contains affiliate links. For more Information, see our disclosure here.
What’s in the Box?
Before discussing the contents of the box, I would like to mention that the FNIRSI FNB58 is available in two variants: one with Bluetooth (blue finish) and one without (black finish). The main (and only) advantage of the Bluetooth model is you can pair the device to your smartphone and use an app to view the readings and even control it.
There is a small price difference between these two models as well. After some thought, I decided to go with the non-Bluetooth model as I don’t plan to use the app at all. If I want to view the data on an external device, I could use the PC Software from FNIRSI (which is very useful and we will see that in detail in a later section).
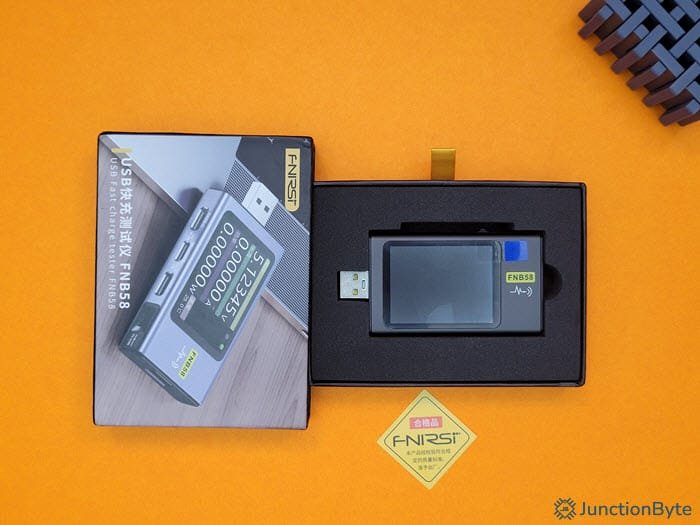
That said, this was my first product from FNIRSI and I’m impressed with the quality of the box (thick cardboard, pull tab, and protective foam). The top of the box has an image of the device while the back has some basic specifications printed on it.
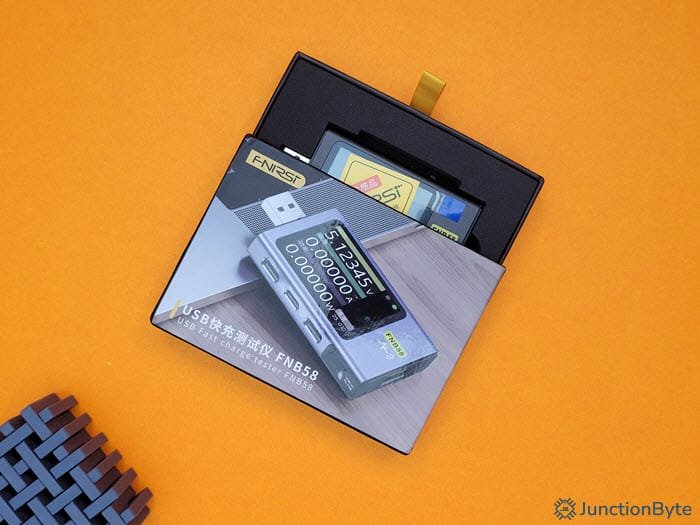
If we open the box (or rather pull it out), you can see the main device in the middle of a foam material. Apart from the FNB58 USB Tester, there is nothing in the box (not even a user manual). They even say you have to download the user manual from their website (as they are going paper-free).
Design of FNIRSI FNB58
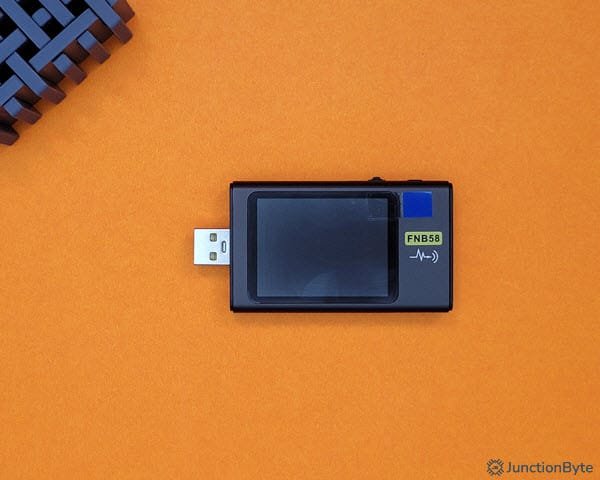
First impressions, the FNIRSI FNB58 looks like a well-built unit. The outer body is metallic, which not only gives some heft to the device but also a premium in-hand feel. A 2” color LCD covers most of the front side of the tester.
The short edge on the left of the device (with display facing us) has a USB-A Connector/Plug (male) while the edge on the right has a USB-A Port (female).

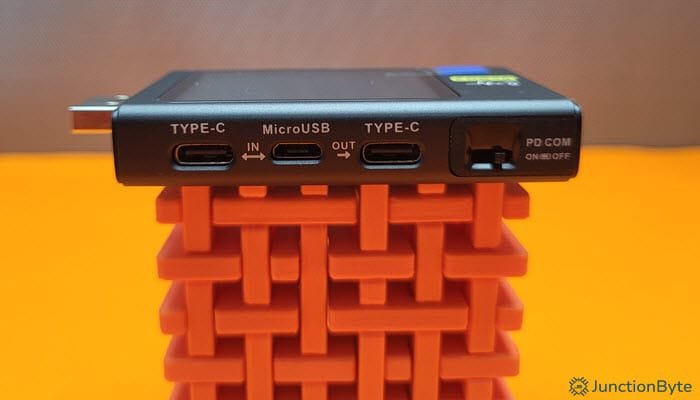
The top long edge has a micro-USB port, a three-way dial wheel switch, and a push button while the bottom long edge has two input ports (USB-C and micro-USB), one output port (USB-C), and a PC Communications toggle switch. There is nothing on the rear of the unit (apart from four Torx screws to slide the metal case out).
User Interface
To understand the basic UI and Controls, we have to power the device on. There are multiple ways to do it, but for starters, I plugged in a USB-C cable from a simple 5V⎓2A USB Adapter into the input USB-C Port.
Basic Meter
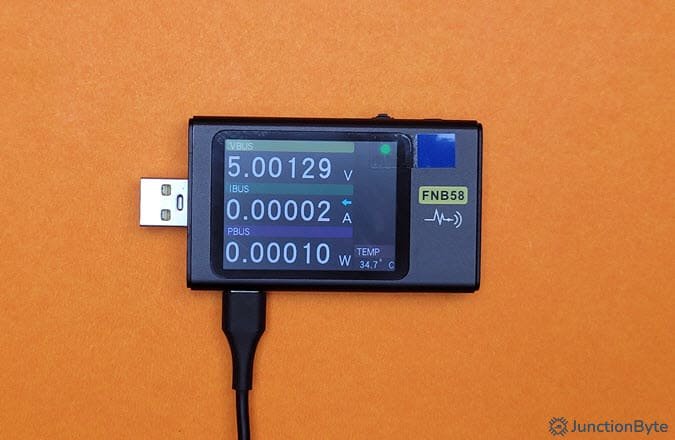
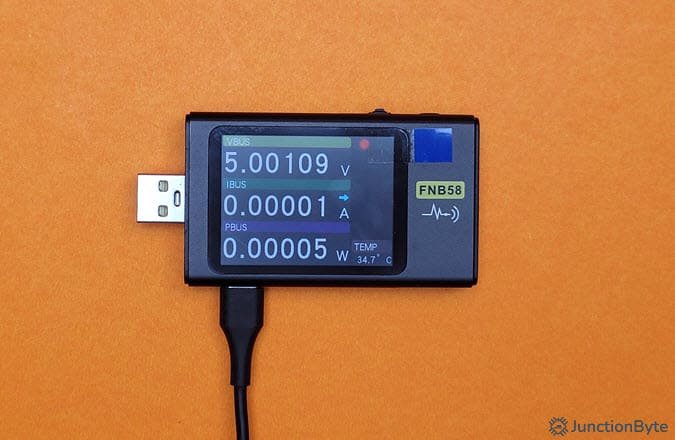
After boot-up, the first screen on the FNB58 shows the essential measurements i.e., voltage, current, and power from the input port. The temperature on the bottom right of the screen is from an internal sensor. We have to use the three-way dial switch on the top to navigate different screens and options. The push button next to this switch acts as a ‘Back’ button.
Let us focus on the buttons for a second. The three-way dial switch is the main navigation and selection button. You can press (or slide) it to left or right, and even click it in the center like a normal push button. For the sake of convenience, I will call these buttons Right (toggle/slide right), Left (toggle/slide left), Center/OK (push down), and Back. We will explore each screen briefly using these buttons.
When on the home screen (the basic measurements display), you can press the center button to hold the values. The green dot on the top right corner of the screen will be off while a red dot comes on.
Energy Statistics
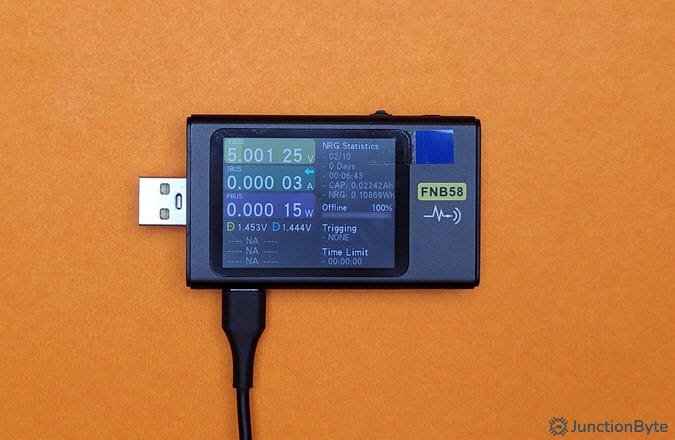
If you press the right button, you will move to the second page. You will still see the voltage, current, and wattage readings. However, there is some additional information with the heading “NRG Statistics” on the right half of the screen. At first, I couldn’t understand the meaning of “NRG” and what this new abbreviation was. Later, I found out that “NRG” is a weird way of writing “Energy.”
The energy statistics show the amp-hour and watt-hour readings for up to 10 different groups. You could assign one group to a particular device and monitor the battery capacity and energy over a period. Click the center button to bring up a menu that helps you switch between different groups.
Oscilloscope
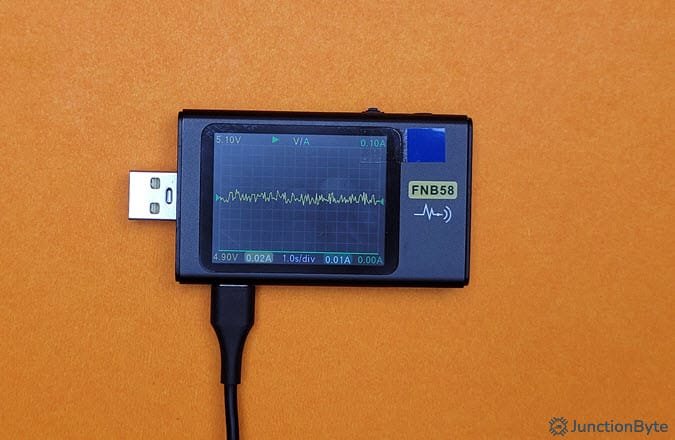
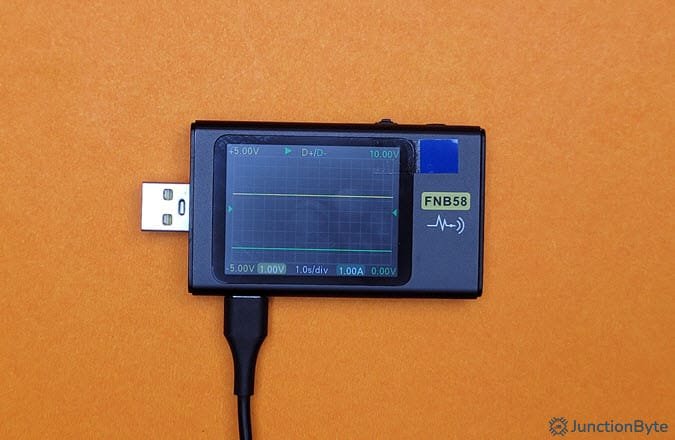
Press the right button to move to the third page and this is where we encounter the first interesting feature of the FNIRSI FNB58 USB Tester. It is an oscilloscope-like screen that displays the waveforms of voltage (yellow waveform) and current (green waveform). You can set the time/division or the horizontal scale by long-pressing the left or right buttons. The possible values are 0.1s/div, 0.2s/div, 0.5s/div, 1s/div, 2s/div, and 5s/div.
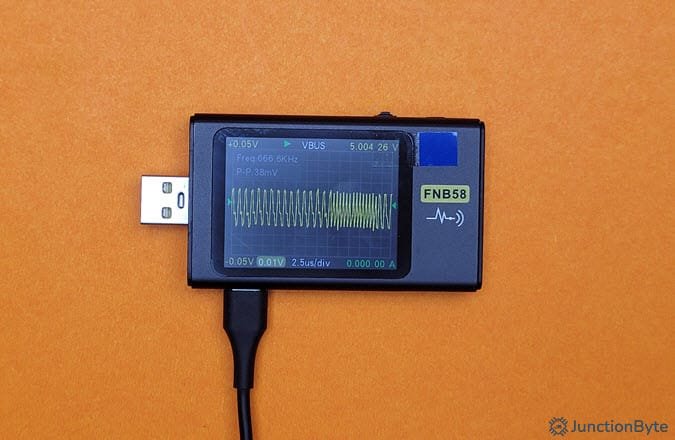
Long-press the center button and you will move to the second oscilloscope page that shows the D+ and D- voltages. If you long-press the center button once again, you will get the third oscilloscope page with voltage ripple waveform. The time base is much smaller with options like 2.5µs/div, 5µs/div, 10µs/div, 20µs/div, 50µs/div, 100µs/div, and 200µs/div. In all the three oscilloscope pages, you can short press the center button to pause the screen.
Application Screen
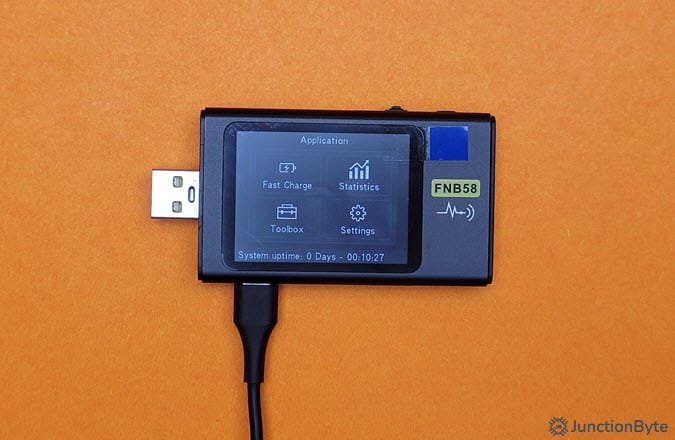
Press the right button one more time to reach the last page of the FNIRSI FNB58 USB Tester. This screen has four sections: Fash Charge, Statistics, Toolbox, and Settings. The “Fast Charge” and “Toolbox” pages deserve their dedicated guide. So, I will save them for later. Let me take you through the other two options, starting with “Statistics.”
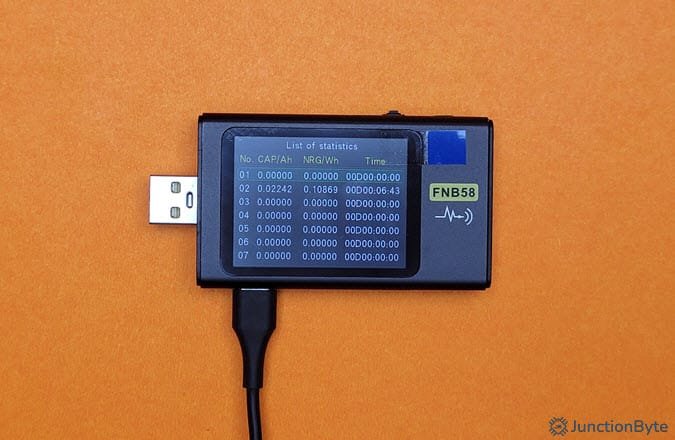
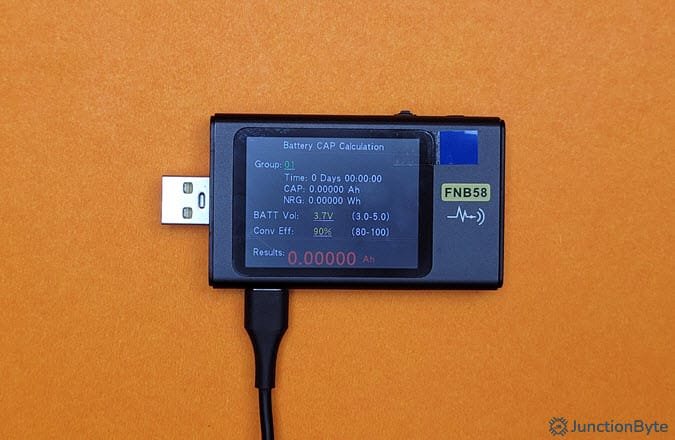
If you remember the “NRG Statistics” we saw earlier, these statistics are directly associated with those. You can view all the ten entries here with the options of selecting a particular group to start recording or clearing the data. In the Battery CAP Calculation page, you can set the battery voltage and conversion efficiency of the battery for each group. There is also an option to view or clear offline records.
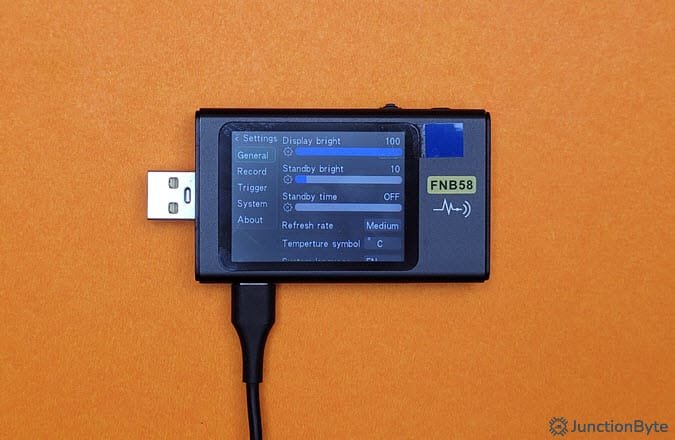
The “Settings” page has a lot of customization options. Here’s a brief list of all the things you can see/do through the general settings:
- Adjust brightness of the display (1 to 100)
- Set standby brightness
- Set standby time (time after which the display brightness goes to standby brightness)
- Adjust the refresh rate of the screen (slow, medium, fast)
- Change the temperature unit (℃ or ℉)
- Change the system language
- Enable or disable G-Sensor (when enabled, screen automatically flips as per the orientation of the device)
- Enable or disable the FNIRSI logo on boot
- Turn the beeper on or off (when on, every button click produces an audible tone)
There are a bunch of record and trigger related settings you can change. Last but not least, you can view the software version or restore factory settings.
USB Power Meter
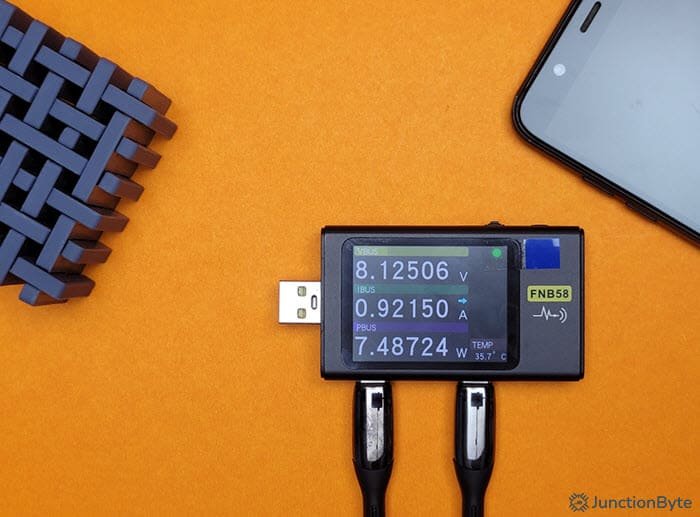
Let us perform some tests and see the capabilities of the FNIRSI FNB58 USB Tester. First of all, the FNB58 is essentially a USB Power Meter i.e., it accurately displays the voltage, current, and wattage of a USB port. I monitored a bunch of mobile phones charging through this meter. It was one of the simplest functions of the meter.
Fast Charge Detection and Trigger
The interesting part of the FNIRSI FNB58 is not in its power metering capabilities but rather in its ability to detect and trigger different fast charging protocols. If you go to the “Application” page, you will see the “Fast Charge” sub-page. When you enter this page, you will be welcomed with a ton of protocol triggering options (after a warning message though). However, before looking at the triggering, the first option is the “Automatic Detection” feature that detects all the charging protocols supported by a charger.
As I mentioned in the intro, I have a very capable 100W GaN Charger from a fairly new brand. It has two USB-C Ports and one USB-A port. I connected a good quality USB-C cable between one of its USB-C ports and the input USB-C port of the FNB58 and selected the “Automatic Detection” option. Here is the result of it.
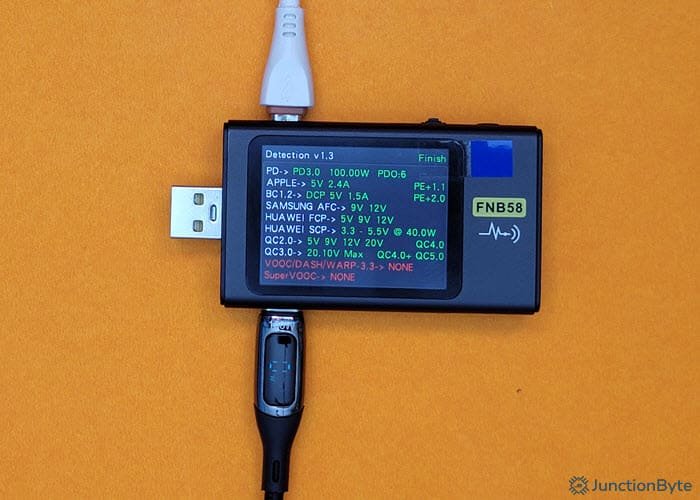
It supports PD 3.0 100W, Apple, BC 1.2, Samsung AFC, Huawei FCP and SCP, QC 2.0, QC 3.0 and the latest QC 4.0, QC 4.0+, and QC 5.0.
Next, we will look at the triggering function. The FNIRSI FNB58 supports triggering of the following fast charging protocols:
- PD Trigger (PD 2.0, PD 3.0, PPS, QC 4.0, PD 3.1/EPR, AVS)
- MI-PD Trigger (USB-A/USB-C, USB-A, USB-C)
- QC 2.0
- QC 3.0
- Huawei (FCP, SCP)
- Samsung AFC
- VOOC/WARP
- SVOOC (1.0, 2.0)
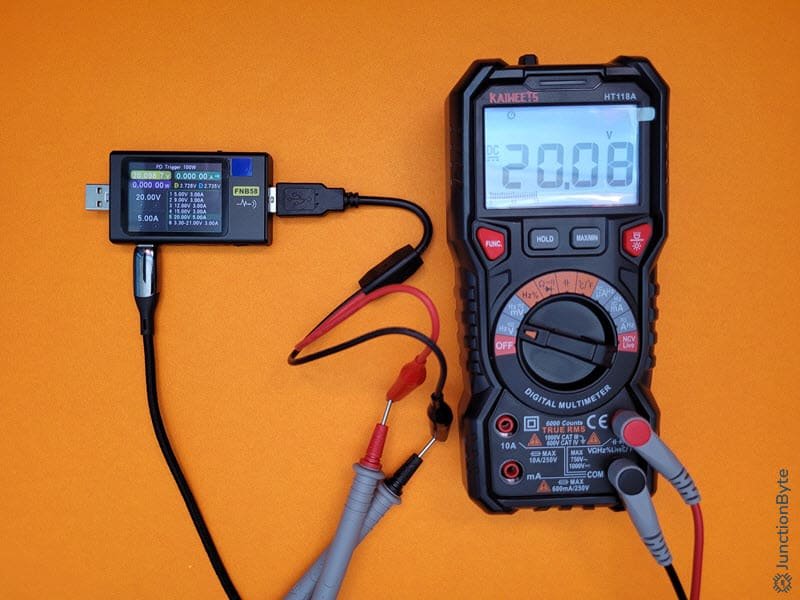
I tried the PD Trigger option with my 100W charger and I can easily set the voltage between 5V, 9V, 12V, 15V, and 20V. Additionally, I could also use the PPS capability of the charger and select any voltage between 3.3V and 21V (in 0.2V increments).

Other Features
Now that we have seen the fast charge triggering ability of the FNB58, let us take a look at some of the “Toolbox” functions.
PD Listener
The PD Listener feature can decode the USB PD communication from the charger. You need two USB-C cables (one between the charger and USB-C Input port of FNB5b and other between USB-C Output port of FNB58 and an external load). Here you can see the load requesting 12V.


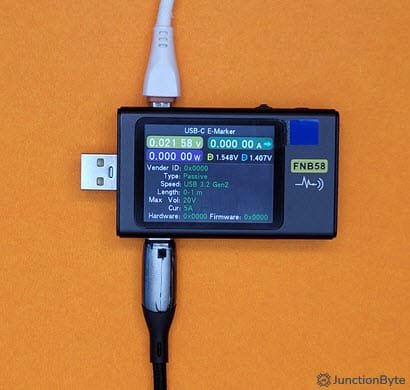
USB-C Cable E-Marker Detection
USB-IF requires an E-Marker (Electronic Marker) IC on all USB-C Cables that support 5A charging current. The FNIRSI FNB58 has a feature that reads data from this E-Marker chip. I have a couple of 5A USB-C Cables from BlitzWolf. FNB58 detects some parameters such as the voltage (20V), current (5A), and length (1m) correctly. However, most of the other data such as Vendor UD, Firmware, etc. are all 0s.
Other Toolbox Functions
- PD Converter: Converts QC 2.0 charger to support PD 2.0 capable devices.
- Cable Resistance Measurement: Measures the internal resistance of cables.
- DASH Cable: Similar to E-Marker but reads data from a DASH cable’s IC.
- Soft DASH and Soft APPLE: Simulates DASH Cable and Apple Cable.
PC Software
FNIRSI has a decent PC application that can communicate with and control the FNB58 USB Tester. Download the software from FNIRSI’s official website and run the executable (no need for any installation).
You have to connect the FNB58 to the PC using its PC Port (micro-USB Port on the top long edge). The UI of the software is very simple with three tabs: Base, Protocol, and System.
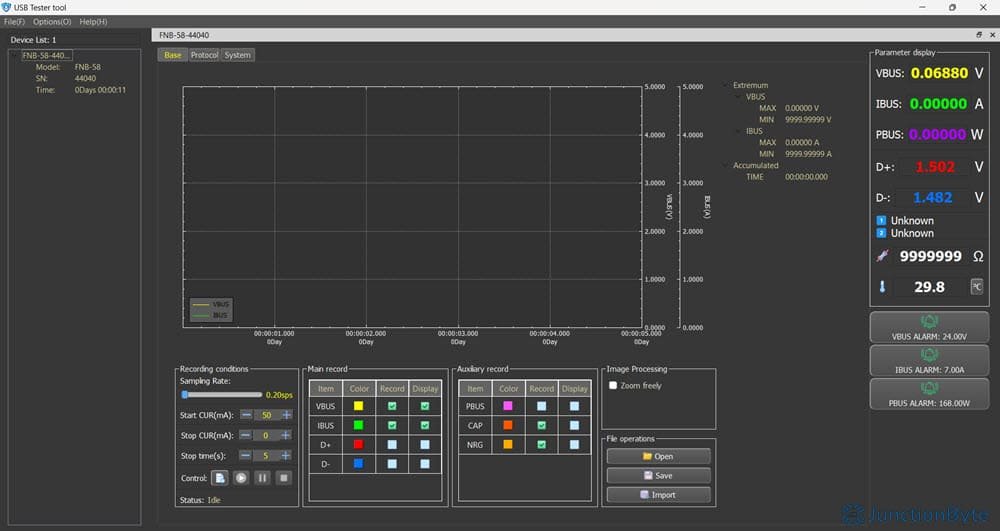
In the “Base” tab, you can record all the measurement data such as the voltage (VBUS), current (IBUS), power (PBUS), signals (D+, D-), capacity (CAP), and energy (NRG).
You have to create a record, start recording, stop recording after a condition, and save the recorded data to PC as a .cfn file. On the right of the screen, you can see the live reading and even set alarms for voltage, current, and power.
In the “Protocol” tab, you can trigger fast charging protocols directly from the PC. It supports QC2.0, QC3.0, Huawei FCP, Huawei SCP, and Samsung AFC triggering from the software.
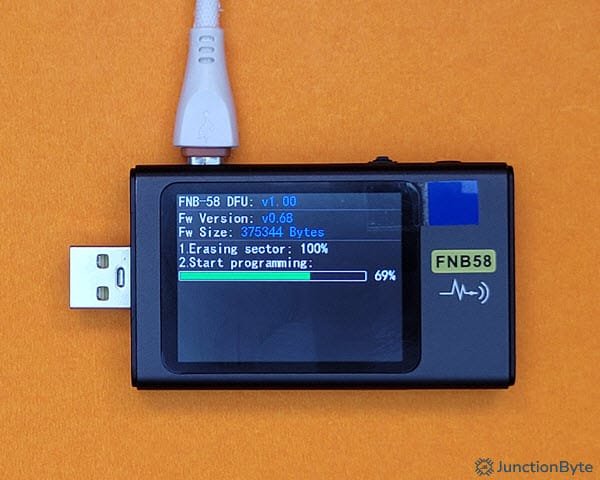
The “System” tab displays some essential information about the FNB58. You can upgrade the firmware using this tab. In fact, when I checked for new firmware on the FNIRSI’s website, I found out that my unit was running on an old firmware. So, I immediately updated it.
You have to put the device in bootloader mode to update the firmware. For this, disconnect the PC cable, press and hold the center button, and then while holding it, connect it to the PC.
Price
I bought the FNIRSI FNB58 USB Tester for ₹3,000 (about $35) including shipping from Banggood. The Bluetooth model was around ₹3,800 ($45) at that time. Is it worth it? Yes. Absolutely. If you work with USB-power-related projects, this is one of the best USB Meters to have around.
Conclusion
Overall, the FNIRSI FNB58 USB Tester and Fast Charge Trigger is an excellent tool to have in your collection. I really liked its protocol detection and fast charge triggering functions. I couldn’t test the accuracy or burden voltage. But what I saw from some other reviewers, it is pretty good in that aspect as well. Remember, this tool provides a quick and simple way to work with USB Chargers and different fast charging protocols.